1_File:
Estimated Time: 15 minutes
Intercepting and analyzing messages
In this lab, we’ll look at some different ways that the Bot Framework allows us to intercept and log data from conversations that the bot has with users. We’ll start by looking at how, without implementing any memory solution, we’re able to view messages and what’s contained in them. This is good for testing purposes, but not ideal for production environments.
After, we’ll look at a very simple implementation of how we can write data from conversations to a file. Specifically, we’ll put messages users send to the bot in a list, and store the list, along with a few other items, in a temporary file (though you could change this to a specific file path as needed).
Lab 1.1: Using the Bot Framework Emulator
Let’s take a look and what information we can glean, for testing purposes, without adding anything to our bot.
Open your PictureBot.sln in Visual Studio. Since we’ve published our bot, we’ll need to add some information to the PictureBot.bot file in order to test our changes locally. In the file, you should see the following contents:
{
  "name": "PictureBot",
  "secretKey": "",
  "services": [
    {
      "appId": "",
      "id": "http://localhost:3978/api/messages",
      "type": "endpoint",
      "appPassword": "",
      "endpoint": "http://localhost:3978/api/messages",
      "name": "PictureBot"
    }
  ]
}
This is what comes in the file when you start from the Template for the v4 SDK. All we have to do is add our appId and appPassword for the Azure Bot Service that we published our bot to. Do that now.
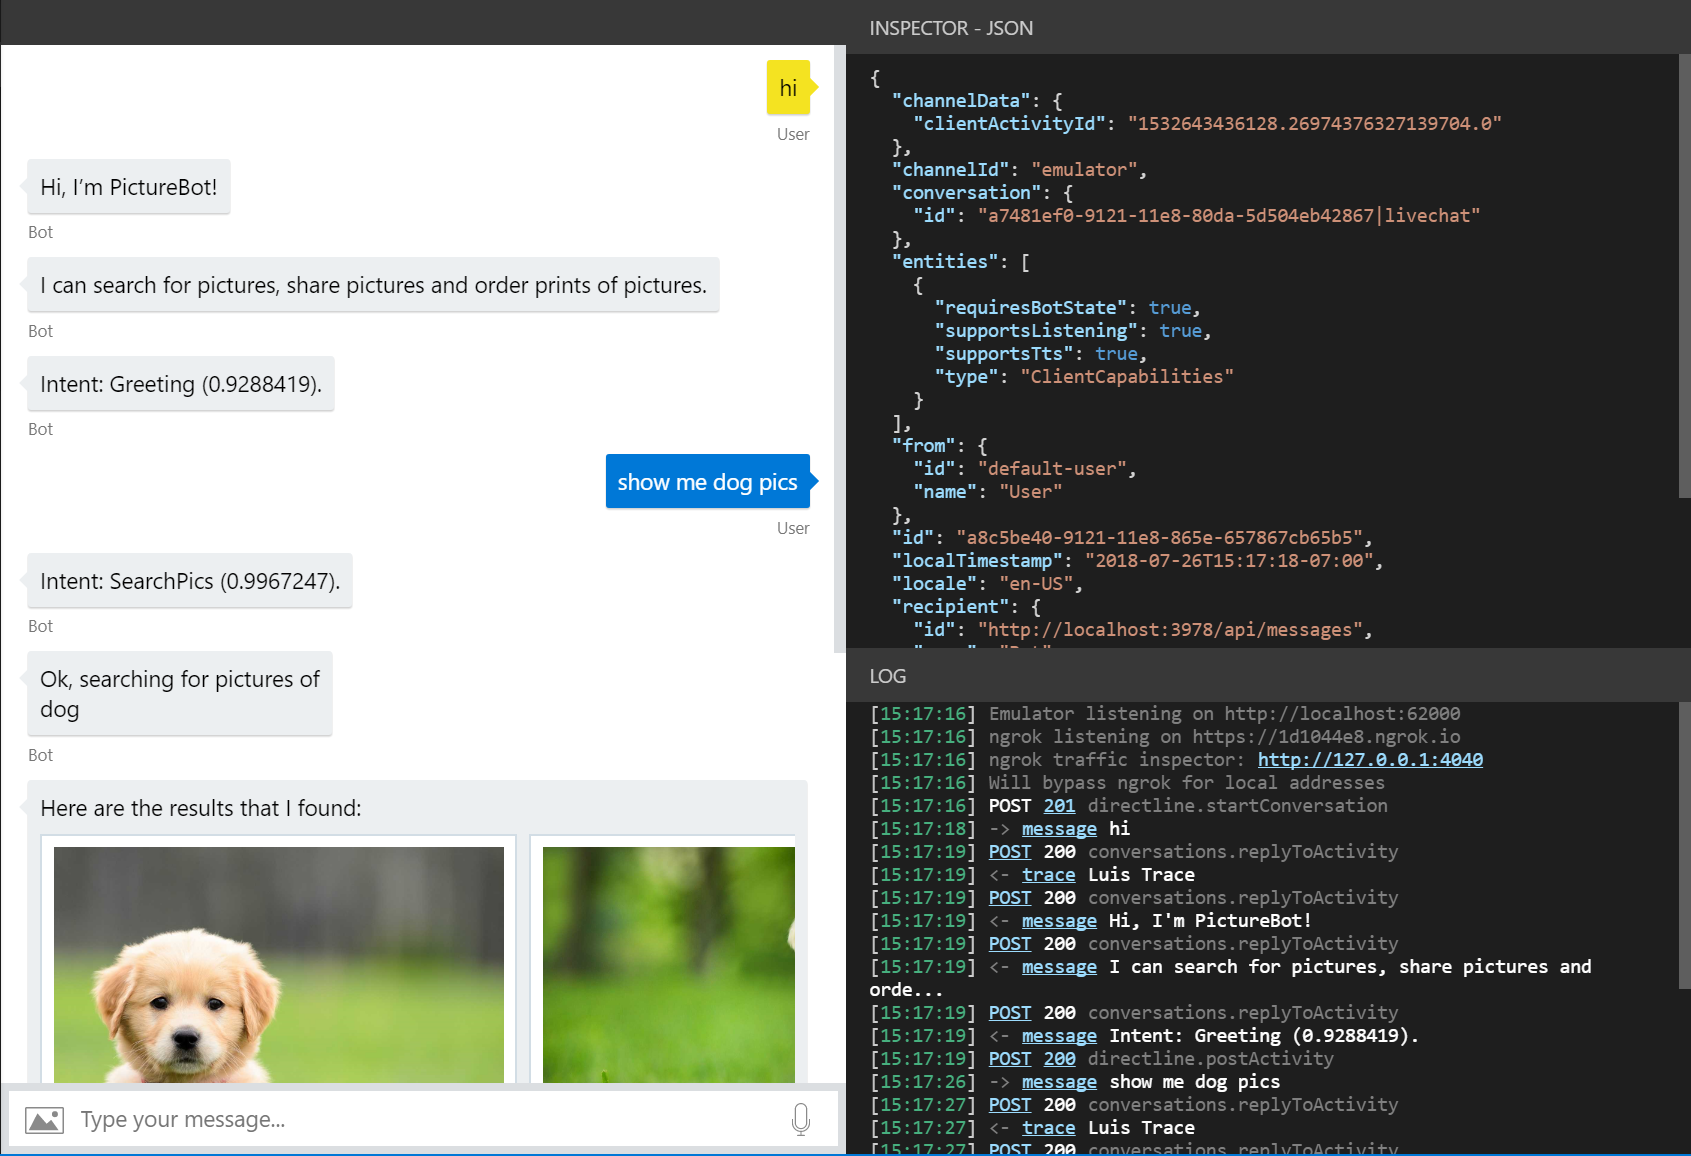
Run your bot, and open the bot in the Bot Framework Emulator, as you have done in previous labs.
A few things you should note:
- If you click on a message, you are able to see it’s associated JSON with the “Inspector-JSON” tool on the right. Click on a message and inspect the JSON to see what information you can obtain.
- The “Log” in the bottom right-hand corner, contains a complete log of the conversation. Let’s five into that a little deeper.
- The first thing you’ll see is the port the Emulator is listening on
- You’ll also see where ngrok is listening, and you can inspect the traffic to ngrok using the “ngrok traffic inspector” link. However, you should notice that we will bypass ngrok if we’re hitting local addresses. If ngrok is not configured yet, don’t worry, we do that in lab02.6.
- If there is an error in the call (anything other than POST 200 or POST 201), you’ll be able to click it and see a very detailed log in the “Inspector-JSON”. Depending on what the error is, you may even get a stack trace going through the code and attempting to point out where the error has occurred. This is greatly useful when you’re debugging your bot projects.
- You can also see that there is a
Luis Tracewhen we make calls out to LUIS. If you click on thetracelink, you’re able to see the LUIS information. You may notice that this is not set up yet for you. Read here how to do that (optional, not required for this lab).
You can read more about testing, debugging, and logging with the emulator here.
Lab 1.2: Logging to a File
Note: We’ve used guidance from the documentation to determine some of the best practices mentioned in this lab.
The memory storage provider uses in-memory storage that gets disposed of when the bot is restarted. This is good for testing purposes only. If you want to persist data but do not want to hook your bot up to a database, you can use the file storage provider. While this provider is also intended for testing purposes, it persists state data to a file so that you can inspect it. The data is written out to file using JSON format.
Since we want to use this process for every message, we’ll use the ConfigureServices method in our Startup class to add storing information to a file. Open that file. Notice that currently we’re using:
IStorage dataStore = new MemoryStorage();
with
middleware.Add(new UserState<UserData>(dataStore));
middleware.Add(new ConversationState<ConversationInfo>(dataStore));
So our current implementation is to use in-memory storage. Again, this memory storage here is recommended for local bot debugging only. When the bot is restarted, anything stored in memory will be gone.
To store our information to a temp file, we’ll need to replace the current IStorage line with:
IStorage dataStore = new FileStorage(System.IO.Path.GetTempPath());
Add the above code and run the bot. In the emulator, go through a sample conversation with the bot.
Next, stop the bot, and open File Explorer. In the location bar type %temp% and hit Enter on your keyboard. This takes you to the location of your temporary files. We recommend sorting the contents so the most recent items are at the top.
The two files you’re looking for start with “conversation” and “user.”
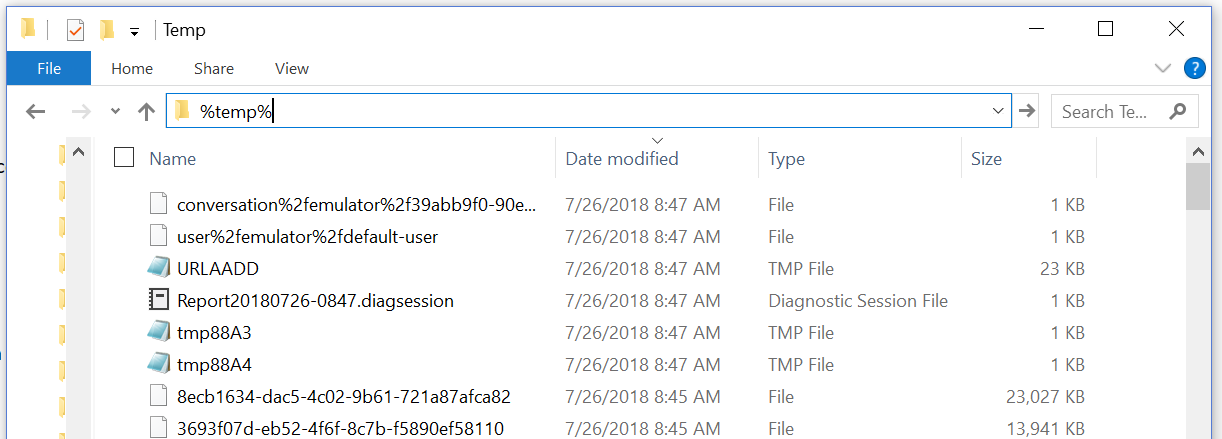
Inspect the contents of the files (using VSCode, Visual Studio, Notepad, or another JSON editor/viewer). What do you see in there? What don’t you see that you were expecting/hoping to see?
Lab 1.3: Logging Utterances to a File
For the purposes of this lab, we are going to focus on updating the “user” file only.
Next, we may want to add the actual utterances that users are sending to the bot. This could be useful to determine what types of conversations and actions users are trying to complete with the bot.
We can do this by updating what we’re storing in our UserData object in PictureState.cs and by adding information to the object in PictureBot.cs.
In PictureState.cs, after the following code:
public class UserData
    {

        public string Greeted { get; set; } = "not greeted";
add:
// A list of things that users have said to the bot
public List<string> UtteranceList { get; private set; } = new List<string>();
In the above, we’re simple creating a list where we’ll store the list of messages that users send to the bot.
In this example we’re choosing to use the state manager to read and write data, but you could alternatively read and write directly from storage without using state manager.
If you choose to write directly to storage, you could set up eTags depending on your scenario. By setting the eTag property to
*, you could allow other instances of the bot to overwrite previously written data, meaning that the last writer wins. We won’t get into it here, but you can read more about managing concurrency.
The final thing we have to do before we run the bot is add messages to our list with our OnTurn action. Open PictureBot.cs.
In PictureBot.cs, after the following code:
public async Task OnTurn(ITurnContext context)
{

    if (context.Activity.Type is ActivityTypes.Message)
    {
        // Get the user and conversation state from the turn context.
        var state = UserState<UserData>.Get(context);
        var conversationInfo = ConversationState<ConversationInfo>.Get(context);
add:
var utterance = context.Activity.Text;
state.UtteranceList.Add(utterance);
The first line takes the incoming message from a user and stores it in a variable called utterance. The next line adds the utterance to the existing list that we created in PictureState.cs.
Run the bot and have a sample conversation with the bot. Stop the bot and check the latest temp file starting with “user.” What do we have now?
Continue to 2_Azure
Back to README